

Locations
Users logged into the same Document ID can see each other’sPresence, Cursors, Comments etc.
However, if you want to add another layer of categorization to organize users together, you can use Location.
To learn more about Locations, check out its dedicated section here.
Contacts
When you reply to a comment, you can@mention other teammates that are added to a User's Contacts List.
To learn more about creating a User's Contacts List, read here.
JWT Authentication Tokens
For enhanced security, you can use JWT tokens to authenticate users instead of passing user data directly in the client-side code. This provides an additional layer of security by verifying user identity on the server side.Access control roles (Editor/Viewer): You can assign a user’s role per resource (organization, folder, document) in the token permissions or via backend access APIs. Editors can create/edit collaboration data (e.g., comments); Viewers are read-only. See Access Control, Generate Token, Add Permissions, and Add/Update Users.
Step 1: Enable JWT Tokens in Console
First, enable JWT tokens in your Velt Console:- Go to console.velt.dev
- Enable the toggle for
Require JWT Token(listed at the bottom of the page)
Step 2: Generate Auth Token
You need an auth token to generate JWT tokens. You can generate this from the Auth Token section in your Velt Console dashboard.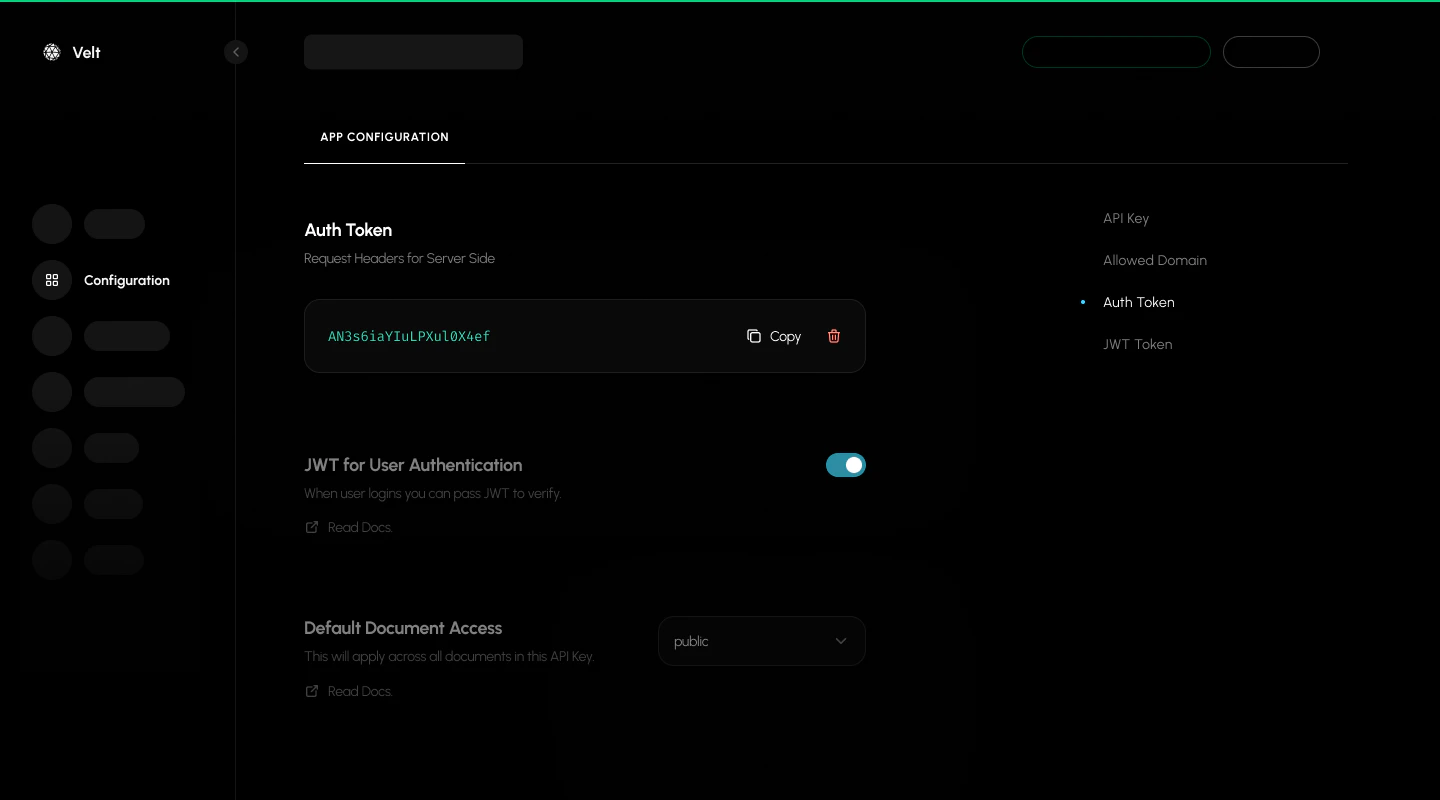
Step 3: Create Server Endpoint for JWT Token Generation
Create a server endpoint that generates and serves JWT tokens to your client. See our generate_token API call for more information.Token Refresh
JWT tokens expire after 48 hours from generation. Handle token expiration by subscribing to the error event and refreshing tokens when needed:If you configured an Auth Provider on
VeltProvider, token refresh is handled automatically. If you authenticate using the identify() method instead, you must listen for token_expired and re-authenticate with a fresh token as shown below.Security Benefits of JWT Tokens:
- Server-side validation of user identity
- Protection against client-side data manipulation
- Secure user authentication without exposing sensitive data
- Token expiration for enhanced security
Error Handling in Authentication
By default, authentication methods likeidentify() and setVeltAuthProvider() return null when authentication fails. You can configure these methods to throw errors instead by setting throwError: true in the options parameter.
When
throwError is enabled, failed authentication attempts will throw an error that you can catch and handle, providing more control over error handling in your application.- React / Next.js
- Other Frameworks
- Default value:
false(returnsnullon authentication failure) - Set to
trueto receive errors that can be caught with.catch()ortry/catchblocks - Useful for implementing custom error handling and recovery flows
Velt Client
Access the core Velt client instance to call SDK APIs and subscribe to core events.Event Subscriptions
| Event | Description | Event Object |
|---|---|---|
initUpdate | Initialization lifecycle updates (documents/locations set/unset, user init) | InitUpdateEvent |
userUpdate | Fired when the Velt user changes (login, logout, or update) | UserUpdateEvent |
documentInit | Document initialization status changes | DocumentInitEvent |
error | Error events (e.g., token_expired) | ErrorEvent |
veltButtonClick | Fired when a Velt Button is clicked | VeltButtonClickEvent |
permissionProvider | Permission Provider events for access requests, results, and errors | PermissionProviderEvent |
dataProvider | Data Provider events for debugging get, save, and delete operations. Includes UserResolverEvent, CommentResolverEvent, AttachmentResolverEvent, ReactionResolverEvent | DataProviderEvent |
- React / Next.js
- Other Frameworks
- Use the React hook
useVeltClient()inside components rendered underVeltProvider. - The client is available after initialization. In HTML/vanilla, call
Velt.init()first. - Always unsubscribe from event subscriptions to avoid memory leaks.
getVeltInitState()
This returns true when both the Velt User and Document are initialized.- React
- Angular
- Vue.js
- HTML
fetchDebugInfo()
- Use this method to retrieve a one-time snapshot of essential debugging information about your Velt integration. This includes details like SDK version, API key, user, organizationId, documentId, folderId, version, and locations.
- You can also access this diagnostic information through Velt’s Chrome DevTools extension.
- Params: None
- Returns:
Promise<VeltDebugInfo>
- React / Next.js
- Other Frameworks
getDebugInfo()
- Use this method to subscribe to real-time updates of debugging information about your Velt integration. This includes details like SDK version, API key, user, organizationId, documentId, folderId, version, and locations.
- You can also access this diagnostic information through Velt’s Chrome DevTools extension.
- Params: None
- Returns:
Observable<VeltDebugInfo>
- React / Next.js
- Other Frameworks
disableLogs()
Control the verbosity of Velt SDK console logs. By default, the SDK outputs both informational logs and warnings. UsedisableLogs() to suppress logs at different levels.
| Call | Effect |
|---|---|
disableLogs() | Turns off warnings only |
disableLogs({ suppressAll: true }) | Turns off all logs |
disableLogs({ warning: false, suppressAll: true }) | Keeps warnings but turns off all other logs |
- React / Next.js
- Other Frameworks